Silke & Martijn’s house renovation in Nijmegen — First floor
Opening up and changing the layout
Strengthening the timber floor
Routing the toilet drain between joists
Waterproofing, warmth and tiles
A new bathroom, a separate laundry room and a refreshed upper floor. Much of the work was hidden beneath the tiles: strengthening the timber floor and relocating the toilet drain between the joists.
25HWR / PROJECT
Project timeline
September–October 2025
Before & after
BeforeAfter
Silke & Martijn’s house renovation in Nijmegen — First floor
Silke and Martijn wanted to use their upstairs space differently. The new bathroom needed a bath, walk-in shower, toilet and basin. The existing timber floor and the drainage route made this much more than a layout change.
02 / Step by step
The project in phases
Phase 1
Demolition & Structural Preparation
The old toilet and timber floor were opened for the new bathroom layout. The difficult part was strengthening the floor with vuren beams and OSB before the 5–6 cm screed and up to 1 cm levelling layer.
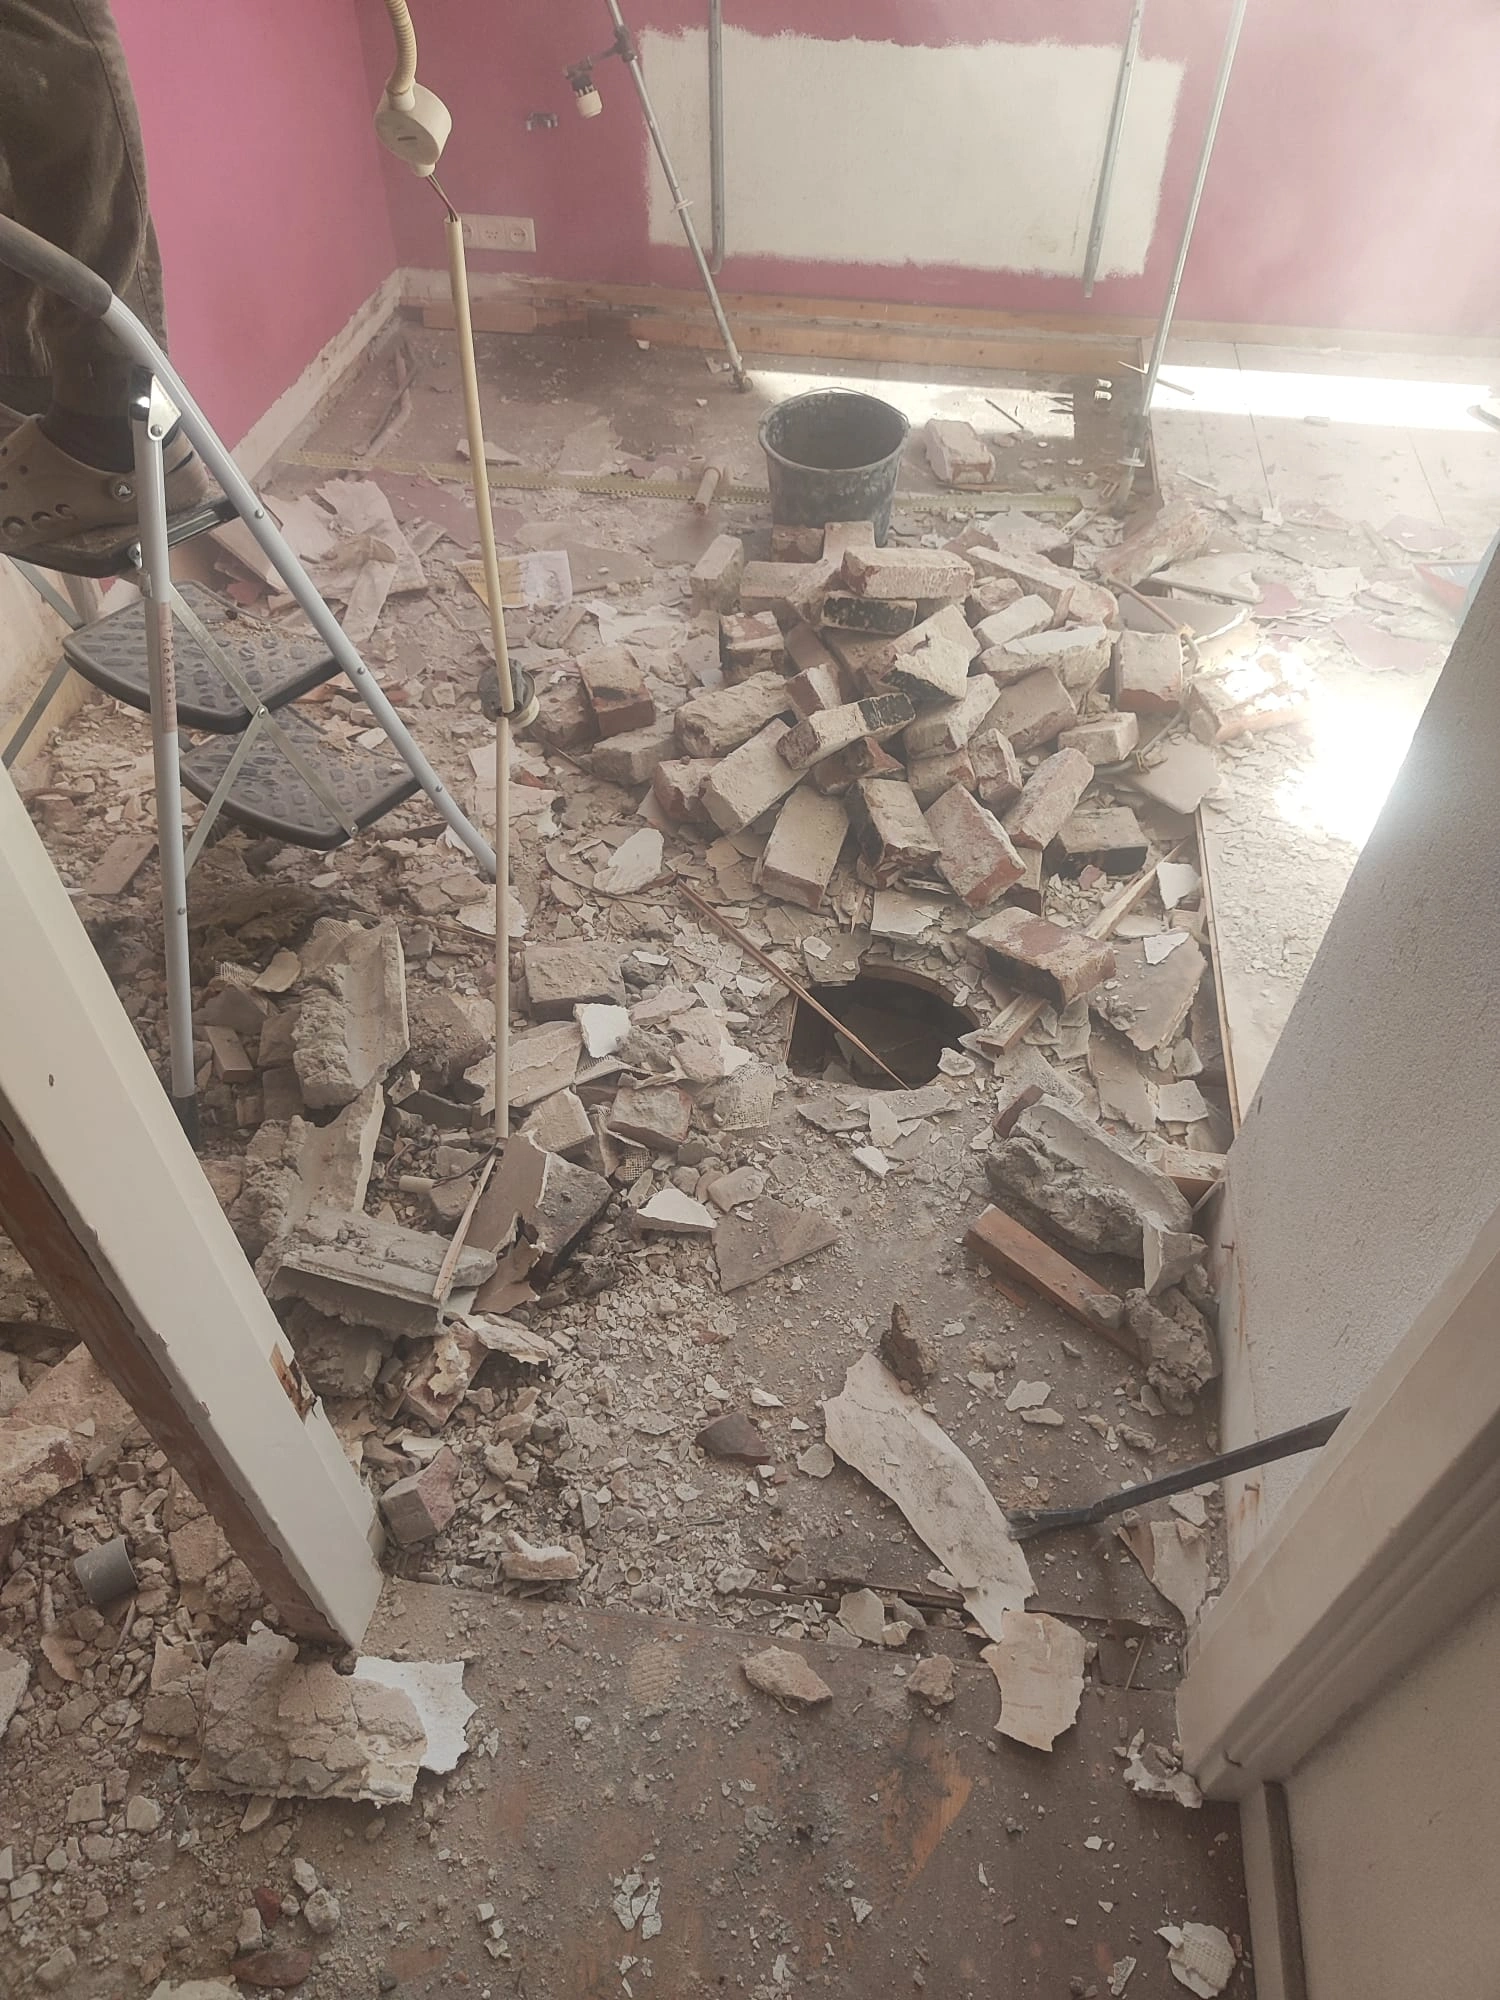
We removed the old toilet, the required partitions and the timber floor in the new bathroom area. Dividing the bedroom created space for the bathroom. Access changed too: we formed the new doorway and adapted the existing openings.
This earlier project reorganised the upper floor so a new bathroom and a separate laundry room could take on different roles. Removing the timber floor in the new bathroom area exposed the structure needed for the next steps. The former toilet position and door openings also had to change.
The work therefore began with layout and access, not sanitary fitting. The new rooms depended on both the supporting floor and the service routes being resolved first.
The hardest step was creating a firm base over the existing joists. We rebuilt the floor with spruce beams and OSB boards, followed by approximately 5–6 cm of screed and up to 1 cm of levelling compound. This prepared the surface for the tiled finish.
The new bathroom introduced a heavier, tiled build-up onto an existing timber floor. The spruce beams and OSB formed the reinforced base; the screed and levelling layer then established the surface for the finish. These layers had different jobs and could not be treated as one simple floor covering.
Movement in a timber structure is particularly relevant beneath rigid finishes such as tiles. The challenge here was the supporting floor itself, which is why its reconstruction is a central part of the story.
Why this matters
A tiled floor needs a different base from an old timber floor. Preparation helps limit movement and uneven junctions.
Phase 2
Sewer & Utility Routing
The 110 mm toilet drain had to be moved around the existing timber joists and connected to its venting route. Water and waste positions were coordinated before the floor was closed.
The toilet moved to a new position, requiring its 110 mm PVC drain to be rerouted through a floor with existing timber joists. We worked out the route and its connection to the drainage ventilation before closing the floor. Water and waste lines for the bath, shower and basin were prepared at the same time.
A 110 mm toilet pipe takes significant space between existing joists. Its position had to connect the relocated WC with the drainage route and ventilation connection, while the timber structure remained part of the problem to solve. This was one of the most demanding aspects of the layout change.
Organising the bath, shower and basin services at the same stage avoided treating each fixture as an unrelated installation. All these connections disappear beneath or behind the finished room.
Why this matters
The large toilet drain needs space. Its route must be resolved before the new floor hides the services.
Phase 3
Drywall Construction & Framing
New framed walls created the bathroom layout and the enclosures for installations. Board support and sanitary mounting positions were coordinated before the surfaces received their finish.
Phase 4
Electric Floor Heating System
The new bathroom uses electric floor heating within the prepared tiled-floor system. Its layout and thermostat connection were coordinated with the fixed sanitary positions.
Phase 5
Plastering Works
The bathroom and the other upstairs walls and ceilings were plastered as part of the wider renovation. Reinforcement at junctions connects new construction to retained surfaces.
Phase 6
Waterproofing and Tiling
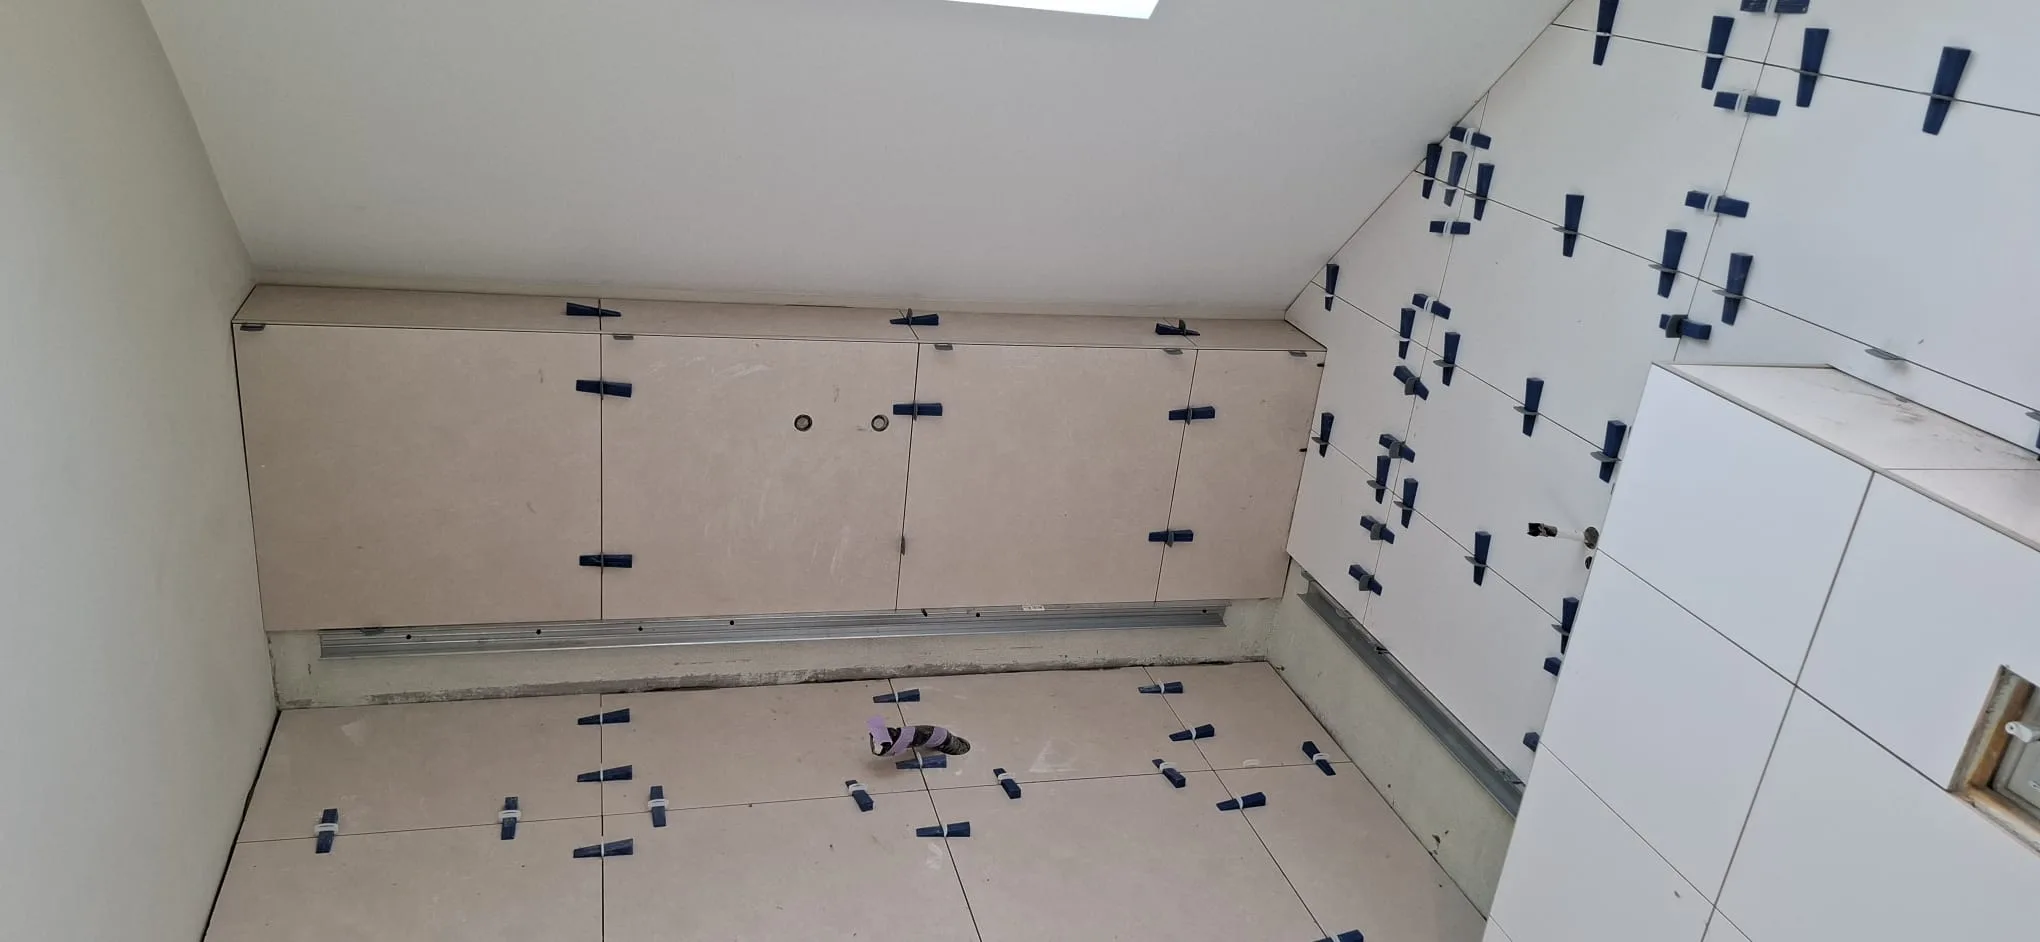
The wet areas were waterproofed before tiling, including the shower junctions and floor transitions. Adhesive, tile alignment and the edge finish complete the protective and visible layers.
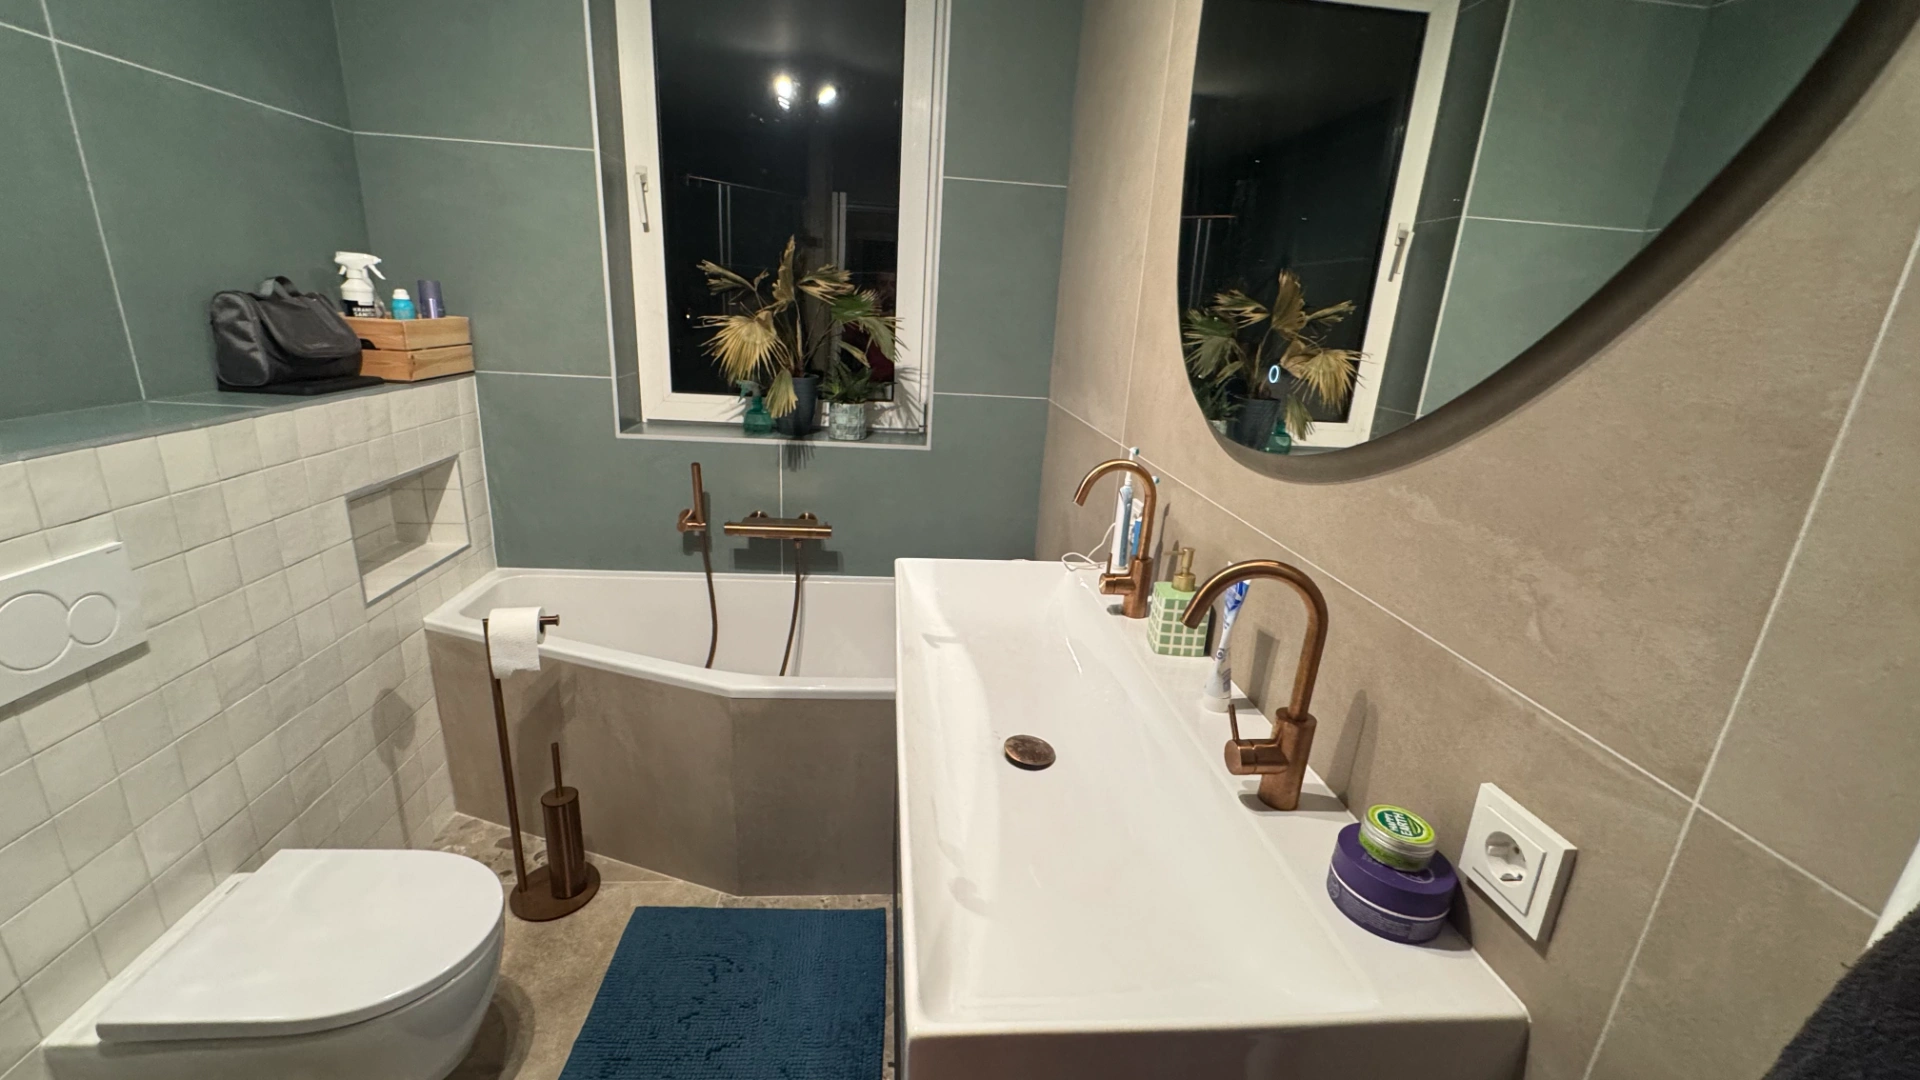
After rebuilding the base, we added waterproofing and electric floor heating, followed by tile adhesive and tiles. We finished the wet-area junctions and fitted the bath, walk-in shower, toilet and basin. The new bathroom also has an electric towel radiator.
Waterproofing addressed the prepared wet areas before the visible tiling. Corners, floor-to-wall connections and pipe penetrations form the detail work within that layer. The electric floor heating and electric towel radiator provide separate forms of warmth within the new room.
The bath, walk-in shower, toilet and basin complete the usable bathroom, but the work that supports them lies underneath: reinforced floor, routed services and moisture protection.
Why this matters
The waterproof layer sits beneath the tiles. Corners and connections need particular care; tiles alone are not the complete waterproofing system.
Phase 7
Sanitary Equipment Installation
The new bathroom combines a toilet, walk-in shower, bath and washbasin, with an electric towel radiator. The former bathroom became a laundry room with washer, dryer and a water-based towel radiator.
The former bathroom became a laundry room for the washing machine and dryer. Here we installed a water-fed towel radiator, separate from the electric radiator in the new bathroom. Each room received connections suited to its new use.
Reusing the former bathroom for laundry gave the older room a new purpose instead of leaving it as redundant sanitary space. The washing machine and dryer required an arrangement suited to laundry use, while the water-fed towel radiator remained a distinct heating choice.
This is separate from the electric towel radiator in the new bathroom. The conversion connected two room changes: one became the main bathroom, the other became the practical washing and drying space.
Why this matters
A renovation can give existing space a new purpose without squeezing every function into one room.
Phase 8
Electrical Installations
Lighting, sockets, switches and the floor-heating thermostat were fitted to the revised layout. The electrical towel radiator belongs to the new bathroom’s electrical connections.
Phase 9
Sealing, Cleaning & Delivery
Sanitary junctions, final connections and cleaning close the bathroom work. The broader upstairs package also included painting the walls, ceilings and staircases during September–October 2025.
The work continued beyond the bathroom door. We plastered and painted the upstairs walls and ceilings and painted the staircase. This brought the new bathroom and laundry room together with the rest of the renewed upper floor.
Plastering and painting the remaining upstairs walls and ceilings extended the renovation beyond the wet rooms. The staircase painting connected the renewed level with the route up from the rest of the house.
Completed in September–October 2025, this was a separate project from the later ground-floor extension. Its defining work was reorganising the rooms, strengthening the timber bathroom floor and solving the relocated drainage.
Why this matters
Coordinated finishes help the existing and newly built areas feel part of the same home.
THIS PROJECT / THEIR EXPERIENCE
What the client says
Reviews appear here when the client chooses to link their experience to this project.