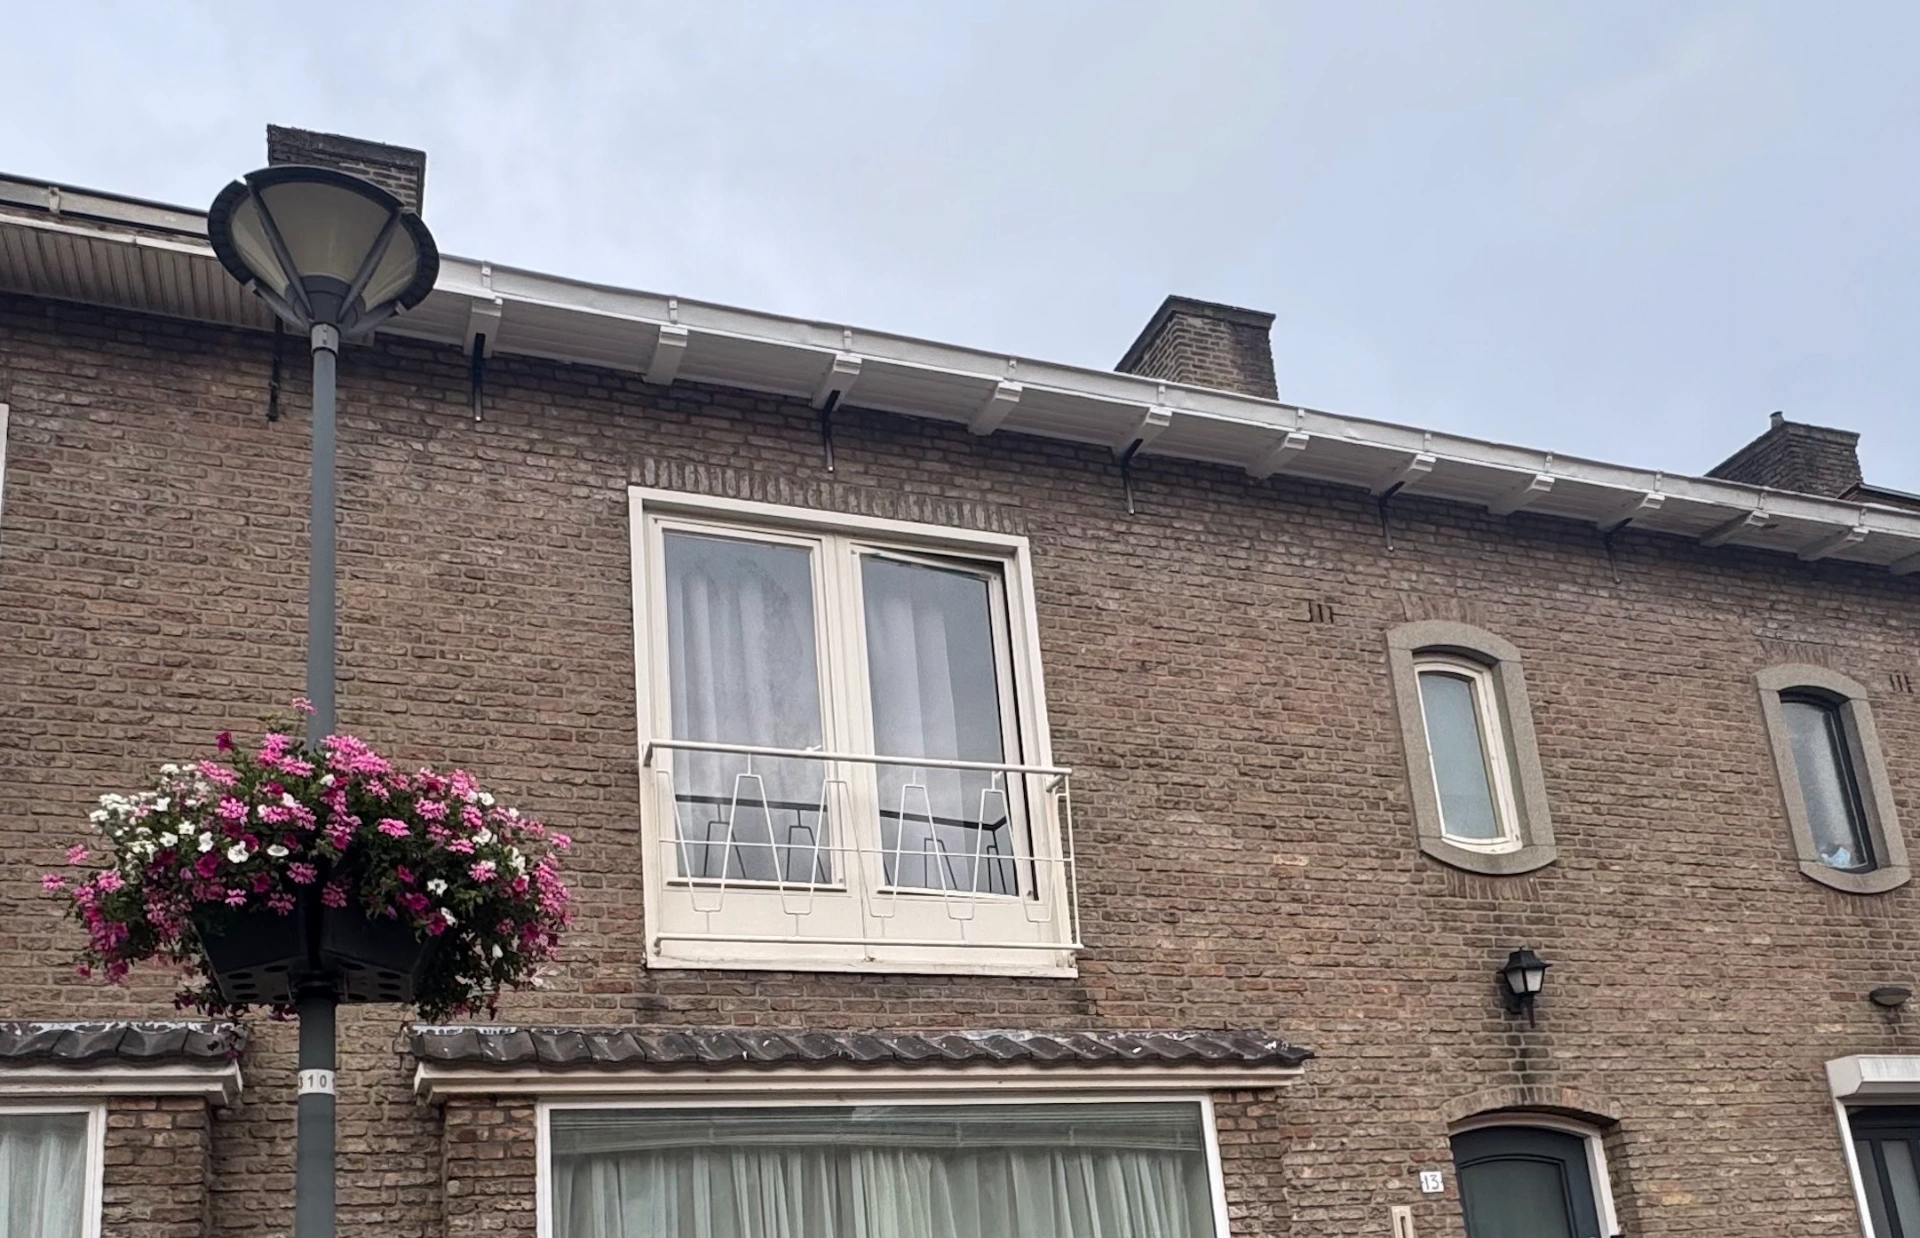
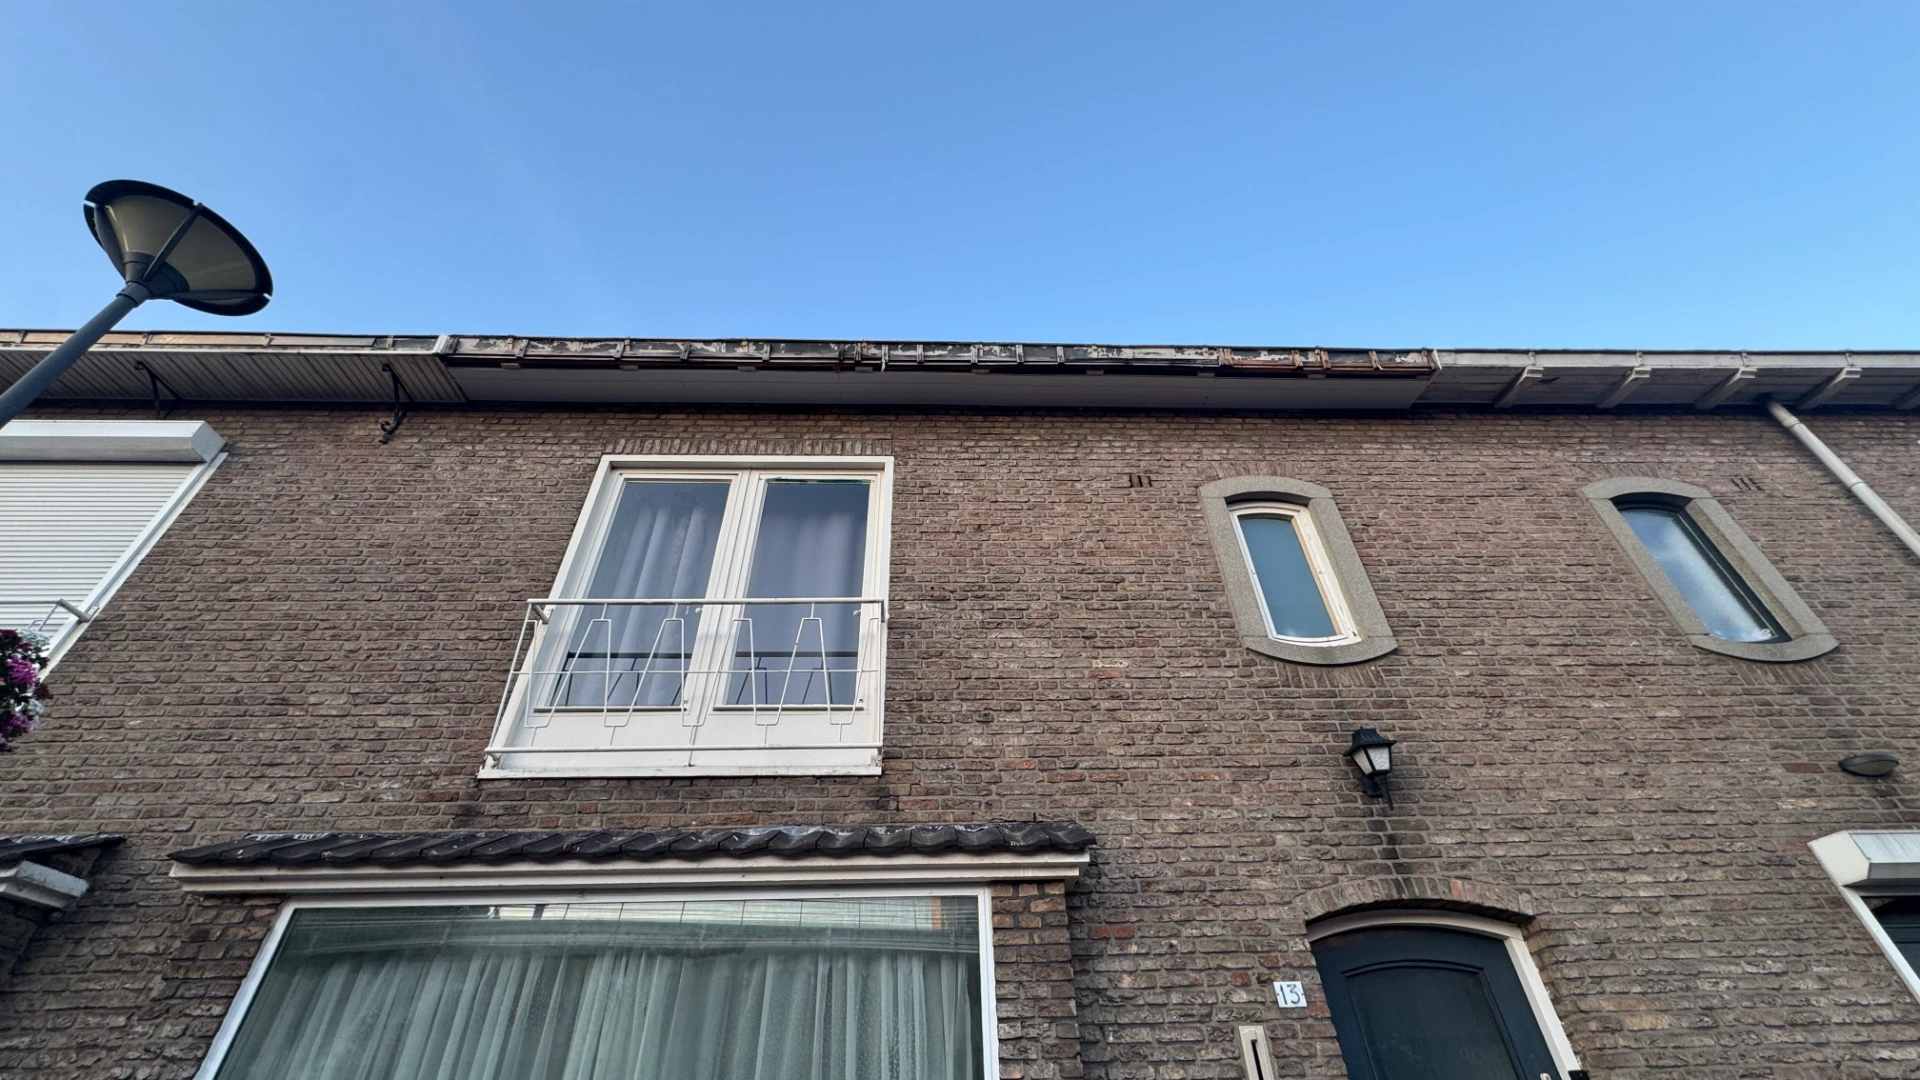
Raymond’s facade and gutter renovation in Roosendaal
Opening up and cleaning at height
Sealing and supporting the gutter
Refinishing the timber
Roof-edge repairs and painting, with particular attention to the zinc gutter and its supports.
12HWR / PROJECT
Project timeline
July 2025
Before & after
BeforeAfter
Raymond’s facade and gutter renovation in Roosendaal
Raymond’s project was around six to seven metres above ground. Improving the timber, gutter and roof junction required access to the existing components first.
02 / Step by step
The project in phases
Phase 1
Existing Facade Boards – Removal & Cleaning
The existing white timber boards were removed and cleaned to expose the working area.
Using a lift, we accessed the roof edge, opened the old cladding and cleaned the zinc gutter. This exposed the surfaces and connections for the next steps.
Raymond’s project focused on the roof edge and gutter rather than the whole facade. Opening the old cladding gave access to the underlying gutter area. The lift made the high-level work reachable, and cleaning the zinc exposed the surface for its waterproof coating.
This first step separated the hidden repair work from the visible painting. Repainting the outside alone would not address the gutter surface or its support.
Why this matters
Components behind cladding need to be accessible before repair.
Phase 2
New Visible Timber Boards
New visible boards were fitted over the projecting timber supports to create the agreed facade appearance.
Phase 3
Timber Sanding & Painting
The visible supports and new boards were sanded and painted to form one coherent underside and facade finish.
We cleaned, sanded and degreased the timber before applying primer and two white exterior coats. The work was completed in July 2025, followed by site cleanup.
Primer and two white exterior coats followed the cleaning, sanding and degreasing. Preparing the timber first gives the coating a suitable surface rather than asking paint to cover contamination or damaged layers.
The completed July package combined access, opening up, gutter treatment, support and painting. It is a compact example of exterior renovation in which the protective work behind the finish is as important as the visible colour.
Why this matters
A coating needs a prepared surface, not loose dirt or weathered layers.
Phase 4
Zinc Gutter Cleaning & Painting
The gutter surface was cleaned and prepared separately from the timber before its specified finish.
Phase 5
Gutter Waterproof Coating
The gutter received the agreed waterproof coating and sealing details.
Phase 6
Internal Gutter Inspection
The inside of the gutter was assessed so hidden defects could be distinguished from the visible finishing work.
Phase 7
Roof-to-Gutter Junction
The roof junction was checked for an unobstructed route into the gutter and the necessary sealing detail.
Phase 8
Mechanical Gutter Reinforcement
Fixings and support details were addressed to secure the gutter rather than relying on coating alone.
The gutter received two coats of waterproof coating. Metal angle supports strengthened the gutter beams, addressing drainage and timber connections before the visible paint finish.
The two coating layers addressed the gutter surface, while the metal angle supports addressed the timber support arrangement. These are different functions within the same roof edge. The work brought both into the repair before the timber received its final appearance.
A gutter is part of the rainwater route around a house. Its condition and connections matter even when the most visible part of the project is the freshly painted fascia.
Why this matters
The gutter needs both drainage and adequate support.
Phase 9
Access Lift
Access at the upper facade was organised with a lift for the work and material handling.
THIS PROJECT / THEIR EXPERIENCE
What the client says
Reviews appear here when the client chooses to link their experience to this project.